
How to Clean and Maintain Multifunctional Smart Bathroom Mirrors
Introduction
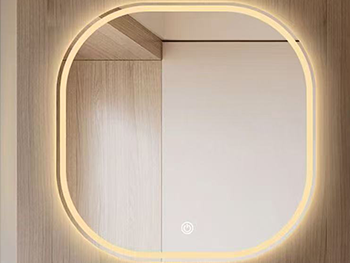
Multifunctional smart bathroom mirrors have become increasingly popular due to their advanced features, such as built-in LED lighting, anti-fog technology, Bluetooth speakers, touch controls, and even integrated displays. However, these high-tech mirrors require proper cleaning and maintenance to ensure longevity and optimal performance. Unlike traditional mirrors, smart mirrors have electronic components that demand extra care to avoid damage.
This guide provides a comprehensive approach to cleaning and maintaining smart bathroom mirrors, covering essential techniques, recommended cleaning products, and best practices to prevent common issues.
---
1. Understanding the Components of a Smart Bathroom Mirror
Before cleaning, it’s important to recognize the different parts of a smart mirror:
- Mirror Surface – Typically made of high-quality glass with anti-reflective or anti-fog coatings.
- LED Lighting – Integrated around the edges or behind the mirror for illumination.
- Touch Controls/Sensors – Allow users to adjust brightness, turn on anti-fog, or control smart features.
- Speakers & Microphones – Found in models with Bluetooth or voice assistant capabilities.
- Power Supply & Wiring – Usually hidden behind the mirror or connected to a power source.
Each component requires specific cleaning methods to avoid damage.
---
2. Essential Cleaning Supplies
Using the wrong cleaning products can damage the mirror’s surface or electronics. Recommended supplies include:
- Microfiber cloths (lint-free and non-abrasive)
- Distilled water or deionized water (prevents mineral streaks)
- Isopropyl alcohol (70% or less) – Effective for disinfecting and removing smudges
- Mild dish soap (for general cleaning)
- Glass cleaner (alcohol-based, ammonia-free) – Safe for coated mirrors
- Compressed air – For dusting around buttons and speakers
- Soft-bristle brush – For crevices and edges
Avoid:
- Ammonia-based cleaners (can degrade anti-fog coatings)
- Abrasive sponges or steel wool (scratches the surface)
- Harsh chemicals like bleach or vinegar (can damage electronics)
---
3. Step-by-Step Cleaning Process
A. Power Off & Safety Precautions
Before cleaning:
1. Turn off the mirror (if it has a power switch).
2. Unplug it if possible to prevent electrical hazards.
3. Avoid spraying liquids directly on the mirror to prevent seepage into electronics.
B. Dusting & Dry Cleaning
1. Use a dry microfiber cloth to wipe away loose dust.
2. For crevices and buttons, use a soft-bristle brush or compressed air.
3. Gently clean around speakers and sensors to avoid moisture buildup.
C. Cleaning the Mirror Surface
1. Dampen a microfiber cloth with distilled water or a mild glass cleaner.
2. Wipe in circular motions to remove fingerprints and smudges.
3. For stubborn stains, use isopropyl alcohol (lightly applied to the cloth, not directly on the mirror).
4. Dry immediately with a second microfiber cloth to prevent streaks.
D. Cleaning LED Lights & Touch Controls
1. Use a slightly damp cloth (not wet) to wipe around LED strips.
2. Avoid excessive moisture near touch sensors.
3. For sticky residue, dip a cotton swab in rubbing alcohol and gently clean.
E. Maintaining Anti-Fog Functionality
If your mirror has an anti-fog feature:
1. Wipe the surface gently to avoid damaging the coating.
2. Avoid abrasive cleaners that can wear off the anti-fog layer.
3. Check the heating element (if applicable) for proper function—if fog persists, the feature may need servicing.
F. Cleaning Speakers & Microphones
1. Use a dry brush to remove dust from speaker grilles.
2. Avoid liquids near microphone openings.
3. If moisture gets inside, let it dry completely before use.
---
4. Preventative Maintenance Tips
A. Regular Cleaning Schedule
- Daily: Wipe down with a dry microfiber cloth.
- Weekly: Deep clean with a mild glass cleaner.
- Monthly: Inspect for any signs of wear or malfunction.
B. Humidity & Ventilation Control
- Use an exhaust fan to reduce moisture buildup.
- Keep the bathroom well-ventilated to prevent mold and corrosion.
- Avoid direct water splashes on the mirror.
C. Protecting the Mirror from Scratches
- Do not place sharp objects near the mirror.
- Use a soft cloth when wiping to prevent micro-scratches.
D. Checking Electrical Components
- Inspect wiring periodically for signs of damage.
- Avoid overloading power outlets if the mirror is plugged in.
---
5. Troubleshooting Common Issues
A. Streaks or Cloudy Appearance
- Cause: Hard water deposits or improper cleaning products.
- Solution: Use distilled water and a microfiber cloth.
B. Touch Controls Not Responding
- Cause: Moisture or dirt buildup.
- Solution: Clean with a dry cloth and ensure hands are dry when using.
C. LED Lights Flickering
- Cause: Loose wiring or power fluctuations.
- Solution: Check connections or consult a technician.
D. Anti-Fog Feature Not Working
- Cause: Damaged coating or electrical issue.
- Solution: Avoid harsh cleaners; if the problem persists, seek professional help.
---
6. When to Seek Professional Help
While regular cleaning can be done at home, some issues require expert attention:
- Electrical malfunctions (sparks, power failures)
- Cracked or damaged glass
- Persistent fogging or display errors
If the mirror is under warranty, check the terms before attempting repairs.
---
Conclusion
Smart bathroom mirrors enhance convenience and aesthetics but require careful maintenance to preserve functionality. By following proper cleaning techniques, using the right products, and adopting preventative measures, you can extend the lifespan of your mirror and keep it looking pristine. Regular inspections and prompt troubleshooting will ensure that your smart mirror remains a valuable and efficient addition to your bathroom for years to come.
By adhering to these guidelines, you can enjoy a crystal-clear, high-performing smart mirror without risking damage to its advanced features.
This website uses cookies to ensure you get the best experience on our website.


 Phone
Phone
Comment
(0)